Integrating with CDW to streamline procurement
You can set up vendor integration with CDW, a value-added reseller, to streamline the process of hardware asset procurement. If an employee-submitted request for a CDW item requires a purchase order, vendor integration enables you to raise the order to CDW with several clicks via the ITAM user console.
For vendor integration to work, the CDW items (of asset type Computer or Consumable) must be listed in ITAM's Product Catalog, and both Ivanti Neurons for ITAM and ITSM must be operational in your work environment.
Currently, CDW is the only vendor that can be configured for integration with ITAM.
Getting started
You first need to access the CDW website and register ITAM as an application. Contact your CDW representative for guidance. During registration, make note of the customer and client IDs, client secret, token API URL, and order API URL—you’ll need these for the procedure below to configure CDW integration within ITAM.
It’s recommended that you test the app registration and API in a pre-production environment before going live. For a pre-production environment, the source server IP needs to be whitelisted with CDW so that they can control the requests coming in; otherwise, the CDW API will produce a 403 unauthorized error. This step is not necessary in a production environment.
Next, access the ITAM user console. The broad steps for integrating with CDW are as follows:
• Turn on the global constant for vendor integration.
•Configure CDW integration.
•Edit the ITAM Product Catalog's asset-request form to include the same address fields entered while configuring CDW integration. (This step is required for ITAM upgrade customers only.)
•Add CDW hardware items (of asset type Computer and/or Consumable) to the ITAM Product Catalog.
Once these steps are completed, you can procure assets from CDW using vendor integration, as described below.
1.Log in as Asset Administrator.
2.Click the  icon at the top of any workspace. The Configuration Console displays in a new browser tab.
3.In the left navigation pane, expand to Build > Global Constants.
4.Find EnableVendorIntegration in the list and set it to True.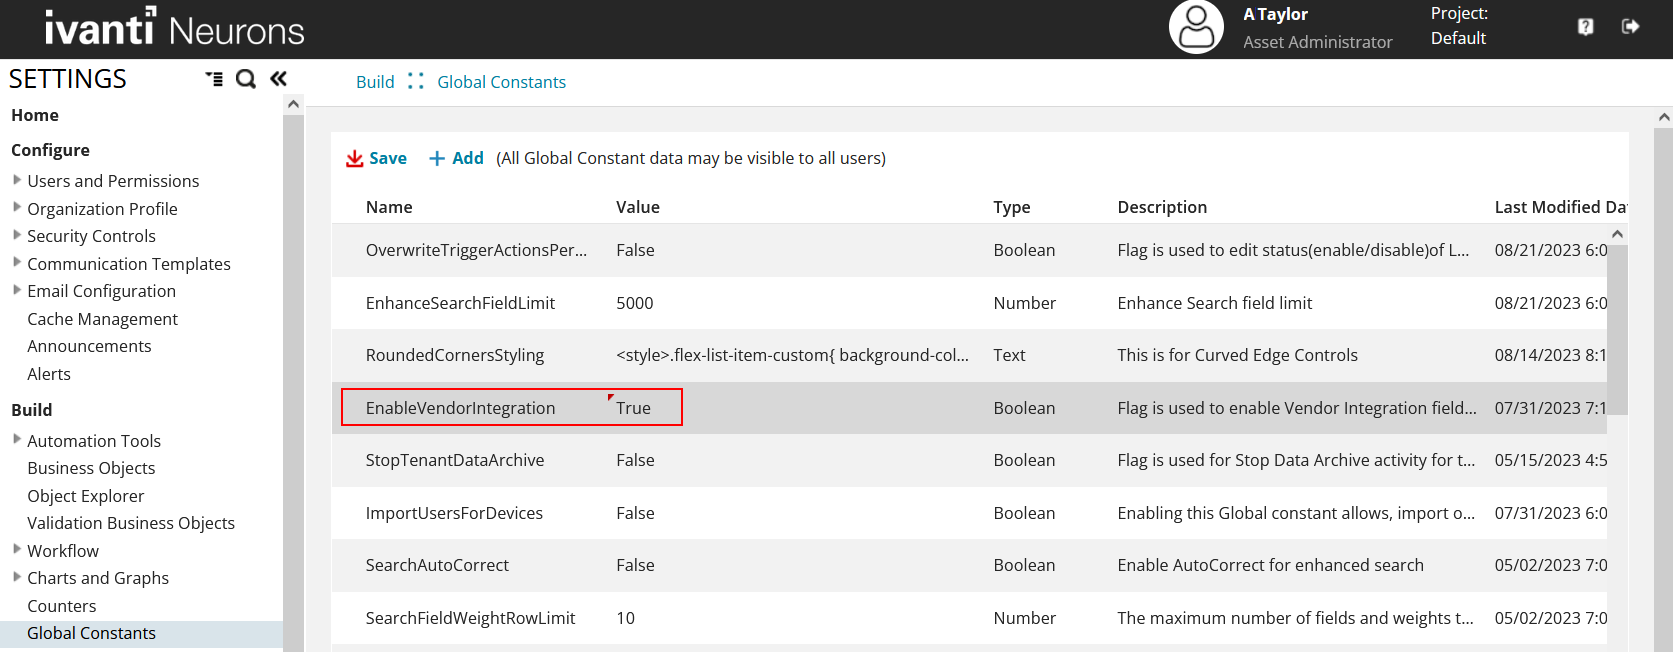
5.Click Save.
1.Log in as Asset Administrator.
2.Click the icon at the top of any workspace. The Configuration Console displays in a new browser tab.
3.In the left navigation pane, expand Extend > Integration Tools > Vendor Integrations > CDW Integration. This option only displays if the EnableVendorIntegration global constant has been set to True.
4.Fill in the fields—all are necessary. The vendor API details enable ITAM to connect to the CDW website. The customer details ensure CDW knows where to ship your company’s purchase orders.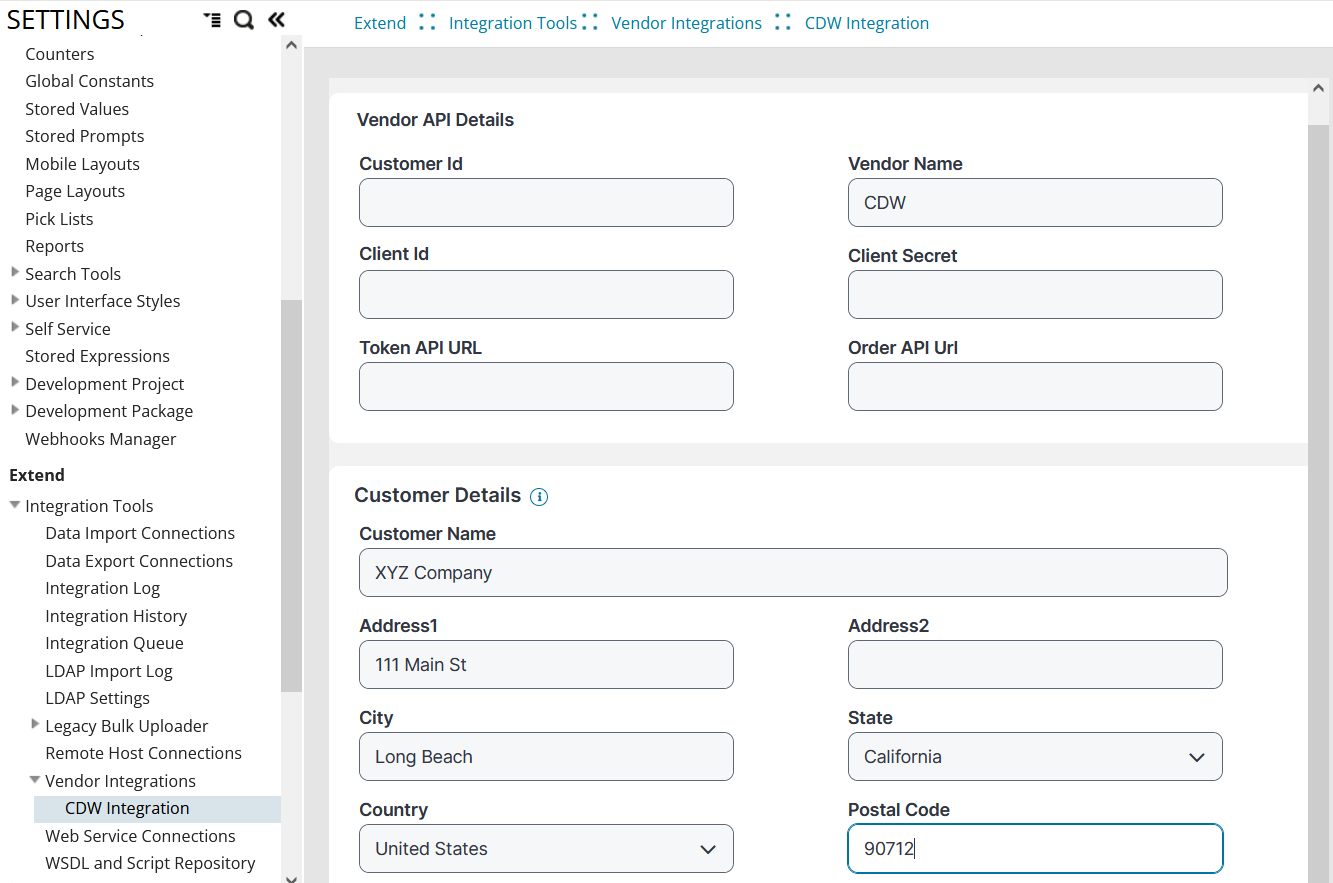
•Customer ID: The unique identifier associated with your CDW account.
•Vendor Name: CDW is the vendor in this case.
•Client ID: The ID used to authenticate your CDW account, generated during the registration process.
•Client Secret: The secret associated with your client ID, generated during the registration process.
•Token API URL: The API token associated with your CDW account and provided by CDW.
•Order API URL: An order API associated with your CDW account and provided by CDW.
•Customer Name: Your company’s name.
•Address/City/State/Country/Postal Code: The default company location you want CDW to ship all purchase orders to.
5.Click Submit. If the configuration was successful, you’ll see a pop-up indicating success.
Address fields are necessary for integration with CDW to work. As part of a request, employees will be required to fill in these fields to indicate where the items should be delivered. The address they enter will need to match the address entered as part of the CDW integration procedure above.
This procedure is required for upgrade customers only. For new customers of ITAM v2023.3 and above, these fields exist by default.
The ITAM user roles of Asset Administrator, Asset Manager, and Procurement Manager can complete this procedure.
For details not provided here about editing request forms, see the ITSM help topics under About Request Offerings.
1.Open the Request Offerings workspace.
2.Click General Services in the left pane, then click Computer Request from Product Catalog in the list. To edit the form for consumables, click Consumable Request from Product Catalog and follow the same instructions below.
3.Click Design request form at the top of the page. Add the following fields and options to the form, starting with step 4 below. Enter the expressions and property IDs exactly as shown:
•Field: Deliver to Office (for v2023.3 this field is hidden from the form, but it's used for internal validation and will be visible in future releases); Control: Check Box; Visible: No; Properties Unique ID: IsDelivertoOffice
•Field: Address Line 1; Control: Text, Number or Mask Field; Visible: Expression GetGlobal("EnableVendorIntegration"); Required: Expression GetGlobal("EnableVendorIntegration") && IsDelivertoOffice == false; Properties Unique ID: AddressLine1
•Field: Street; Control: Text, Number or Mask Field; Properties Unique ID: AddressLine2
•Field: City; Control: Text, Number or Mask Field; Properties Unique ID: AddressCity
•Field: Postal Code; Control: Text, Number or Mask Field; Properties Unique ID: AddressPostalCode
The State and Country fields require drop-down pick lists that will enable employees to select from available options stored in the ITAM system.
•Field: State (if this field existed previously on the form as a text field, delete it and create from new as a drop-down field); Control: Drop-down selection; Pick List: Validation list; Validation list to use: State Address US and Canada State (the Title Field will default to State Long—leave as-is); Properties Unique ID: State
•Field: Country; Control: Drop-down selection; Pick List: Validation list; Validation list to use: Countries Full Name (the Title Field will default to Country Full Name—leave as-is); Properties Unique ID: AddressCountry
4.In the Form Designer Tools pane, double-click the control type you want to use for the new field. 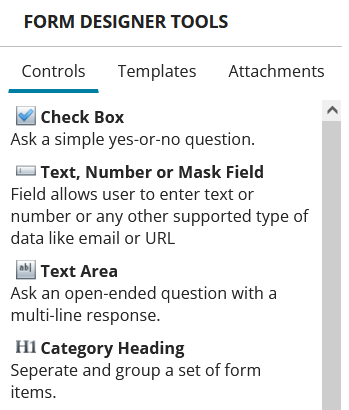
The control type you selected will display as a text box next to the control itself, similar to this: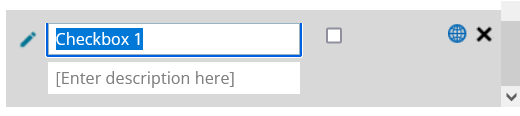
5.Place your cursor in this text box and type the name of the field. A description is optional.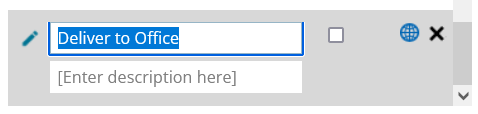
6.Click the  icon to the left of the new field name to open the Item Configuration Editor dialog. Edit the options to match the ones listed above for each new field, then click OK. Leave as-is any options not listed above.
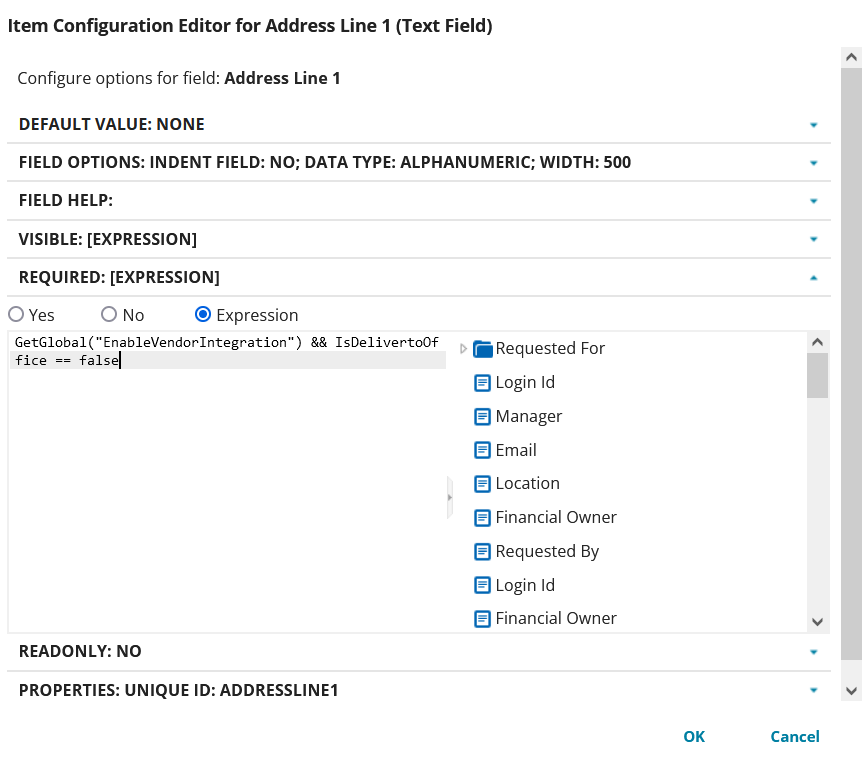
7.Repeat steps 4-6 for each field you're adding.
8.If needed, you can reorder any of the fields in the Request Form list by dragging and dropping them to a new position.
9.Preview the updates, then click Save & Exit.
The new fields will display in the Preview page and online Product Catalog only if you've set the EnableVendorIntegration global constant to True.
The ITAM user roles of Asset Administrator and Asset Manager can complete this procedure.
1.Open the Product Catalog workspace.
2.Add hardware items (of asset type Computer or Consumable) that you want to make available for purchase from CDW. For details about adding hardware items to the Product Catalog, see Product Catalog.
Beyond the usual required fields, the Part Number field is also mandatory for each added item. Fill it in with the CDW-supplied part number. If the part number is missing, you will not be able to raise the purchase order to CDW via the ITAM user console.
3.Save each item, then click Submit for Approval (at the top of the page), so that the status changes to Approved.
Procuring assets from CDW using vendor integration
Once the procedures above are completed, your ITAM system should be set up to raise a purchase order to CDW when needed.
Employees (assigned the Self Service or Self Service User role) can submit an asset request as usual by accessing the ITSM Support Portal > Service Catalog > General Services, clicking the Computer Request from Product Catalog button, and following the prompts on the request form.
If the submitted request is for a CDW item that requires a purchase order, the following conditions must be met for vendor integration to work:
•The request must be for a standard CDW item in the ITAM Product Catalog. Non-standard items are not allowed.
•Information in the request form's address fields must match the fields for city, state, and country entered during CDW integration above. Someone other than the submitter, such as a Procurement Manager or Service Desk Analyst, must verify that the fields match before the purchase order can be raised to CDW.
The ITAM user roles that can manage this workflow are Asset Administrator, Asset Manager, Procurement Manager, and Storage Manager.
1.Open the Asset Requests workspace, then open the submitted request.
2.Review the request details to ensure the address fields for city, state, and country match the same fields entered during CDW integration configuration above. Edit the fields if necessary.
3.Click Create Purchase Order (at the top of the page). This action does three things in the Purchase Orders workspace:
•It creates the CDW purchase order and associated line item within ITAM.
•It generates a purchase request number as the purchase order name.
•It sets the purchase order status to Created.
4.Open the Purchase Orders workspace, then open the newly created CDW purchase order.
5.Click Submit (at the top of the page) to change the status to Approved.
6.Click Raise PO Vendor to initiate the order within the CDW system and generate an asset request number. If successful, the status will change to On Order and the Vendor Order Status tab will update with the purchase order.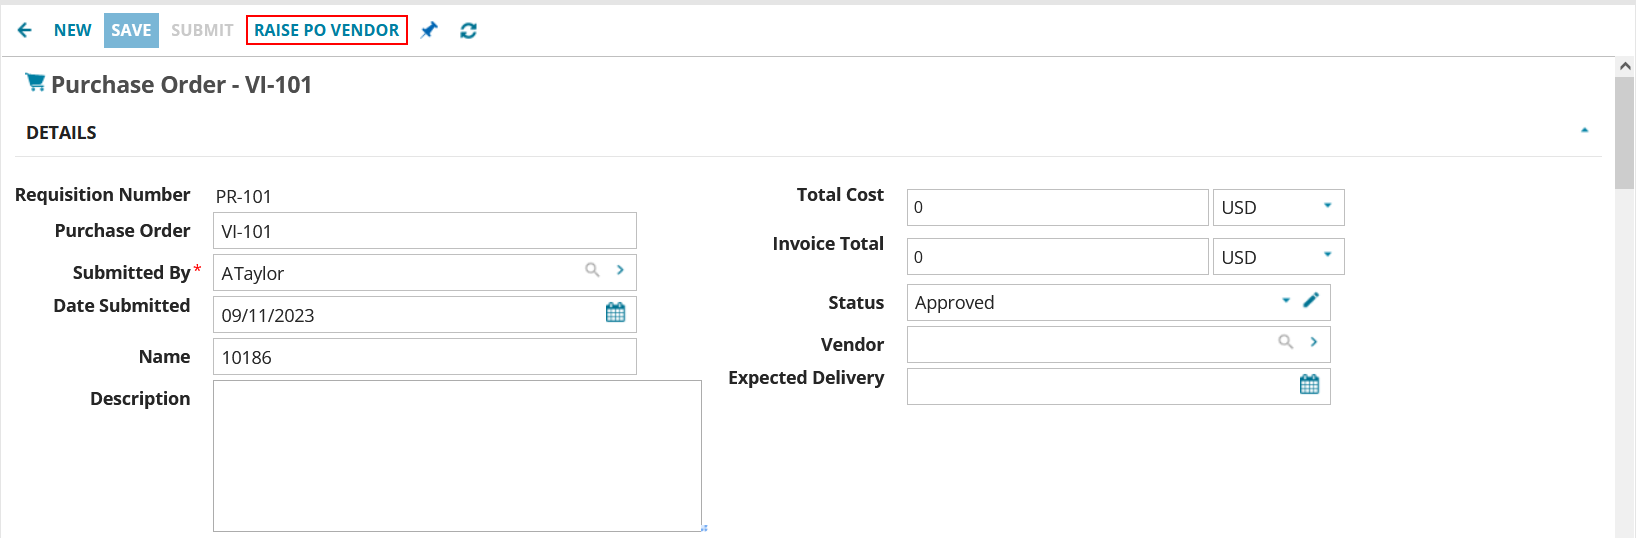
7.Click Save.
From the Vendor Order Status workspace, you can track the progress of all CDW purchase orders. If an error occurs upon raising the purchase order to CDW, this workspace provides an error description that can help you troubleshoot the issue. Open the purchase order to view details about the error.
To turn off integration with CDW at any point, set the global constant EnableVendorIntegration to False. This will hide the address fields on the asset-request form that are necessary for integration.
1.Log in as Asset Administrator.
2.Click the icon at the top of any workspace. The Configuration Console displays in a new browser tab.
3.In the left navigation pane, expand Build > Global Constants.
4.Find EnableVendorIntegration in the list and set it to False.
5.Click Save.